
The Ozmoz Interface
Ozmoz operates from a discreet main window and a system tray icon, allowing you to dictate or generate text in any application. The interface is designed to be minimal and stay out of your way, activating only when you need it via keyboard shortcuts.
How It Works
The core workflow is simple and powerful, transforming your voice into polished text in three steps.
1. Dictation
Just talk as you normally would using the recording hotkey. Ozmoz captures your voice in real-time.
2. Transcription
Advanced AI converts your speech into highly accurate text, automatically applying punctuation and formatting.
3. Smart Processing
Your transcribed text can be instantly processed by an AI model or an automated Agent to match exactly what you need.
Key Features
AI Agents
Create powerful, trigger-based automations to reformat text, write replies, summarize content, and more.
Context-Aware AI
Ozmoz can use selected text or even see your screen (Pro feature) to provide the AI with perfect context for its tasks.
Extensive Language Support
Dictate in numerous languages with high accuracy.
Customizable Hotkeys
Configure your own keyboard shortcuts for recording, AI generation, and visibility.
Free & Pro Tiers
New users receive free access to core features to experience Ozmoz's potential. Upgrade to Pro for unlimited usage and advanced capabilities like Screen Vision.
Initial Setup
Step 1: Installation & First Launch
After installing Ozmoz, launch the application. You will be greeted by the main settings window, which is your central hub for all configurations.

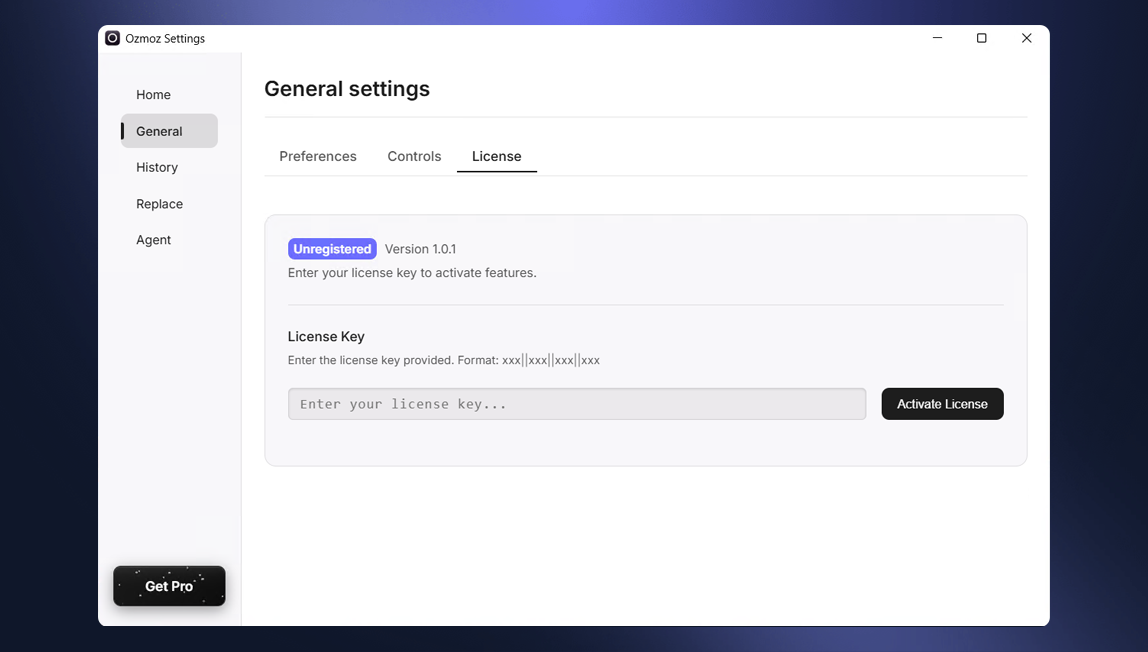
Step 2: License Activation
Navigate to the "License" tab within the General settings. Enter your license key here to unlock Free or Pro features. This is the first and most important step to get started.
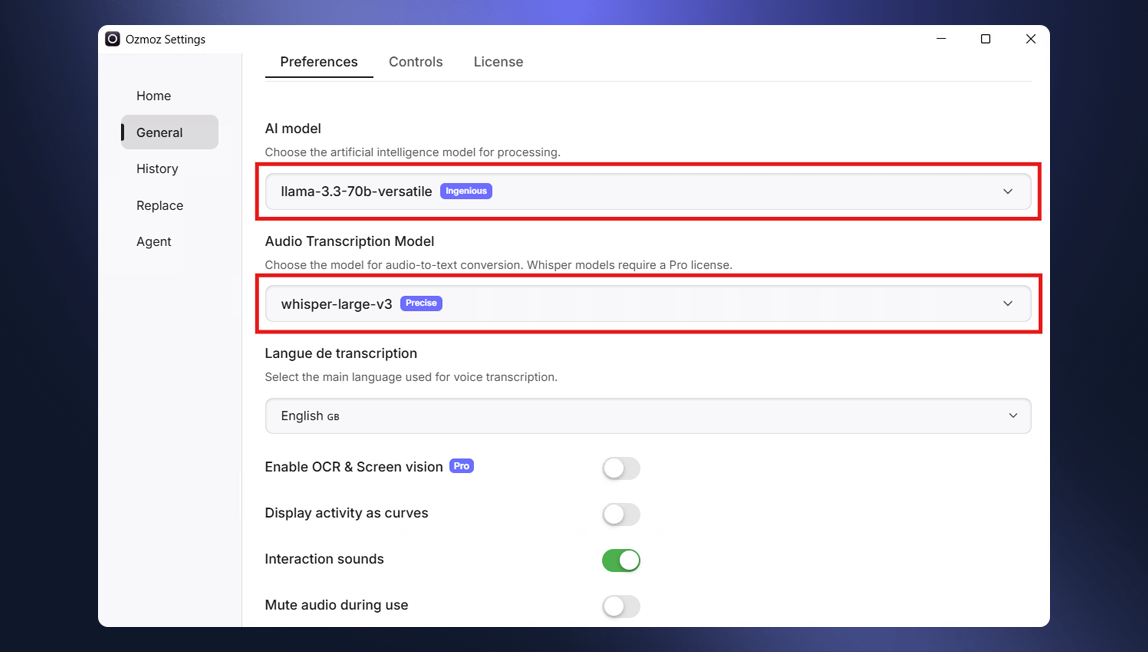
Step 3: Core Preferences
In the "Preferences" tab, select your primary transcription language and the AI model you wish to use for text generation. The chosen AI model will affect the style and capability of the responses.
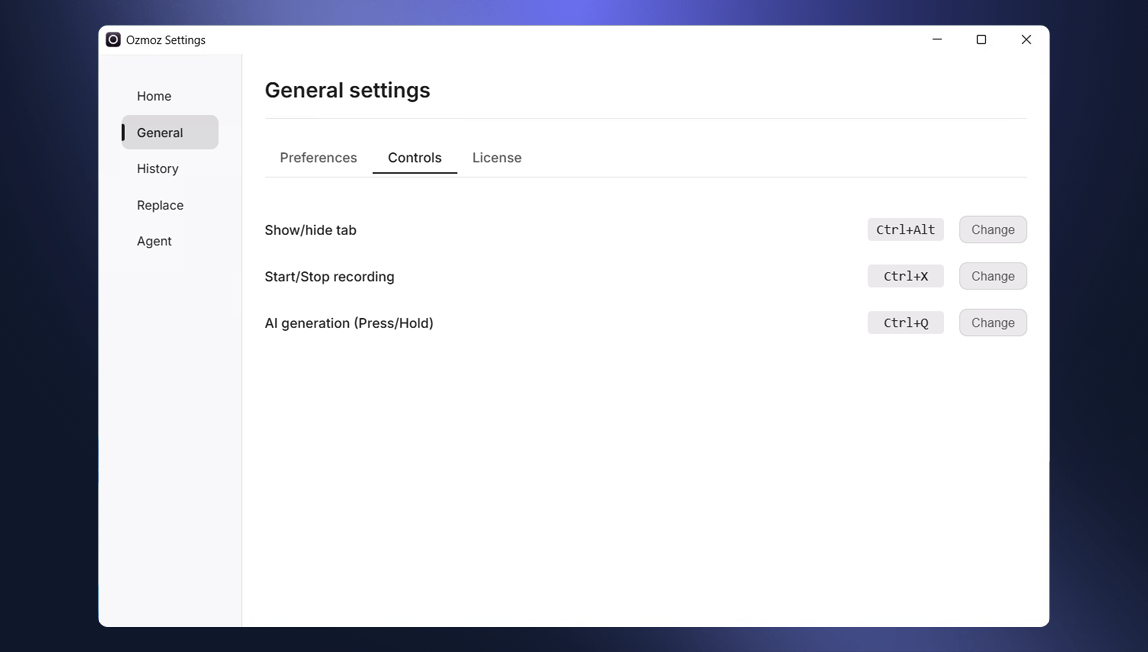
Step 4: Configure Controls
Go to the "Controls" tab to set your keyboard shortcuts for recording, AI generation, and toggling the main window's visibility. These hotkeys are essential for using Ozmoz efficiently in any application.
Once these steps are complete, your basic setup is done! You can access these settings anytime by clicking the Ozmoz icon in your system tray.